Some time ago I was was given the task of determining the differences in codebase between three different AX environments, running AX 2012 RTM.
You might ask why would this be necessary, if you follow best practices that code is always moved from DEV to TEST, from DEV TO STAGING, and from STAGING to PRODUCTION, the only differences would be new ?
Well, sometimes it is just not possible to test and correct a data problem that the users have in PRODUCTION by having the data rolled back into DEV within the timeframe given to solve the problem, and this leads to someone making hotfixes in the code directly in PRODUCTION. I know, I know - NOT recommendable.
However the situation was that noone was exactly sure that the codebase in the environments were aligned, and wanted to know if there were any differences and where.
Enter Araxis Merge, which is a wonderful tool for comparing and merging text-files. The advantage Araxis has over Dynamics AX's own compare tool are several:
Especially the last item on the above list came in VERY handy in my case.
I wrote a very small AX class, that simply scanned the AOT-layers that had been used for customization for any customized elements. When finding one it simply exported it naming the file with the following convention: "Layer"-"ElementType"-"ElementName".xpo
This produces a number of .xpo-files (one for each customization found in the AOT). Now I ran the class for each of the three environments producing files for DEV, TEST and PROD.
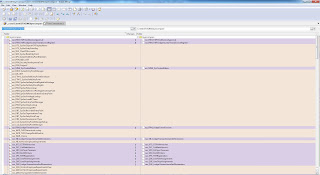
I then put the files from each environment in a separate folder on my disk, and asked Araxis to do a folder comparison. And voila:
(note that the example shown in the picture only contains a two way folder comparison).
Araxis shows you a list where it has first compared the folders and it shows if there are files missing (customized elements) in one of the folders (environments) with a grey or green color. The purple color indicates that the element is there in both environments, but if the element is different in one environment it has been marked with a small red square. On these lines you can click on the element, to open a file compare, where you have merging possibilities.
Here you can find the class that does the export.
Ax Class:AOTExport
In future it will be exciting to see if Microsoft Dynamics Lifecycle Services will bring possibilities/tools regarding issues like this one.
You might ask why would this be necessary, if you follow best practices that code is always moved from DEV to TEST, from DEV TO STAGING, and from STAGING to PRODUCTION, the only differences would be new ?
Well, sometimes it is just not possible to test and correct a data problem that the users have in PRODUCTION by having the data rolled back into DEV within the timeframe given to solve the problem, and this leads to someone making hotfixes in the code directly in PRODUCTION. I know, I know - NOT recommendable.
However the situation was that noone was exactly sure that the codebase in the environments were aligned, and wanted to know if there were any differences and where.
Enter Araxis Merge, which is a wonderful tool for comparing and merging text-files. The advantage Araxis has over Dynamics AX's own compare tool are several:
- Better visual indication of differences
- Better merging possibilities
- Three way comparison
- Three way comparison of files in directories
Especially the last item on the above list came in VERY handy in my case.
I wrote a very small AX class, that simply scanned the AOT-layers that had been used for customization for any customized elements. When finding one it simply exported it naming the file with the following convention: "Layer"-"ElementType"-"ElementName".xpo
This produces a number of .xpo-files (one for each customization found in the AOT). Now I ran the class for each of the three environments producing files for DEV, TEST and PROD.
I then put the files from each environment in a separate folder on my disk, and asked Araxis to do a folder comparison. And voila:
(note that the example shown in the picture only contains a two way folder comparison).
Araxis shows you a list where it has first compared the folders and it shows if there are files missing (customized elements) in one of the folders (environments) with a grey or green color. The purple color indicates that the element is there in both environments, but if the element is different in one environment it has been marked with a small red square. On these lines you can click on the element, to open a file compare, where you have merging possibilities.
Here you can find the class that does the export.
Ax Class:AOTExport
In future it will be exciting to see if Microsoft Dynamics Lifecycle Services will bring possibilities/tools regarding issues like this one.


Interesting suggestion. Too bad Araxis Merge is not free.
ReplyDeleteIf you did a similar compare on two AOSes having server side debugging acticated and on their XppIL\Source-folder, you would even be able to fully compare two AOSes X++ code.
Winmerge (http://winmerge.org/) IS free and more user-friendly than Araxis. I have been using it to perform exactly this kind of XPO comparisons for years now.
ReplyDelete@Marcel: Will certainly try out that option.
ReplyDeleteThanks for the input. :)
Interesting. Did you create the 3 tables for AOTproperties,Index and fields?
ReplyDelete